
Chapter 3 – For Want of a Nyakil
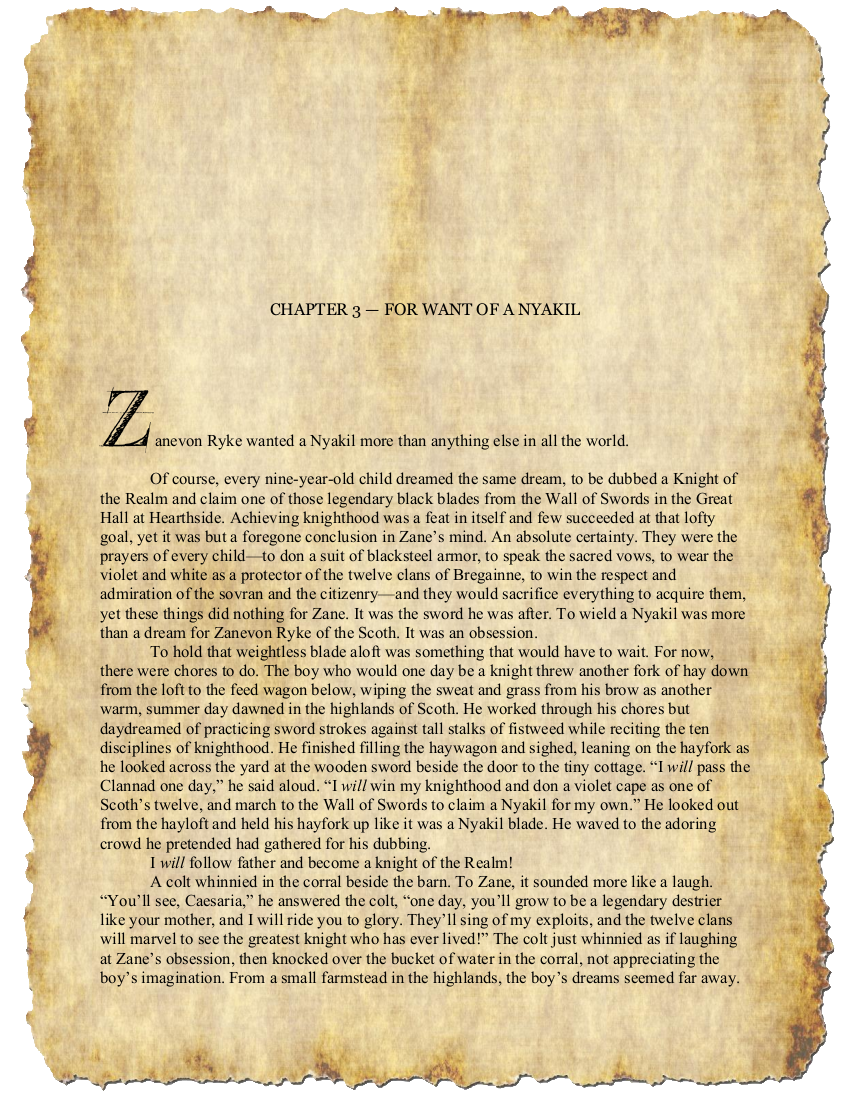
Spirit Adept – Chapter 1
I’ve decided to start adding teasers about my novel: The first pages of each chapter. Here’s Chapter 1.
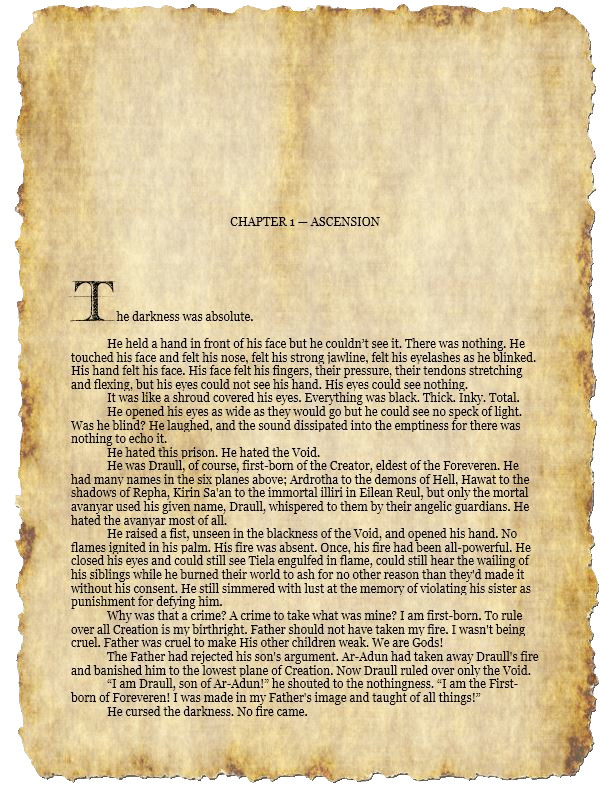
NO SMALL THINGS – The Beautiful Stuff Poetry Anthology
My good friend S. E. Reichert has just published a poetry anthology containing beautiful work from a variety of writers. I’m honored to have my poem “Aspen Autumn” included in it.
You’ll find the book available here:
https://www.amazon.com/dp/1692331558/ref=rdr_ext_tmb
I hope you will pick it up.
From her site:
Sarah Reichert (S. E. Reichert) is a writer, novelist, poet, and blogger. She is a member of Northern Colorado Writers, Wyoming Writers, Inc., and a member of The Romance Writers of America. She is the author of Fixing Destiny, Finding Destiny, and Fighting Destiny a series of paranormal romances set in Maine.
She is currently embroiled in a new trilogy, set in her home state of Wyoming, and following the trials and joys of three sisters from a small town as they navigate the complexities of failure, forgiveness, and fortitude.
Reichert’s work has been featured in The Fort Collins Coloradoan, Haunted Waters Press, Tuliptree Publishing’s 100-Word Dash, and Sunrise Summits: A Poetry Anthology. She has blogged for The Writing Bug and the Be True Be Love website.
“The Beautiful Stuff” is a site dedicated to the promotion of creativity and the positive outlook on self-care, human interaction, and living with passion.
Reichert lives in Fort Collins with her family.
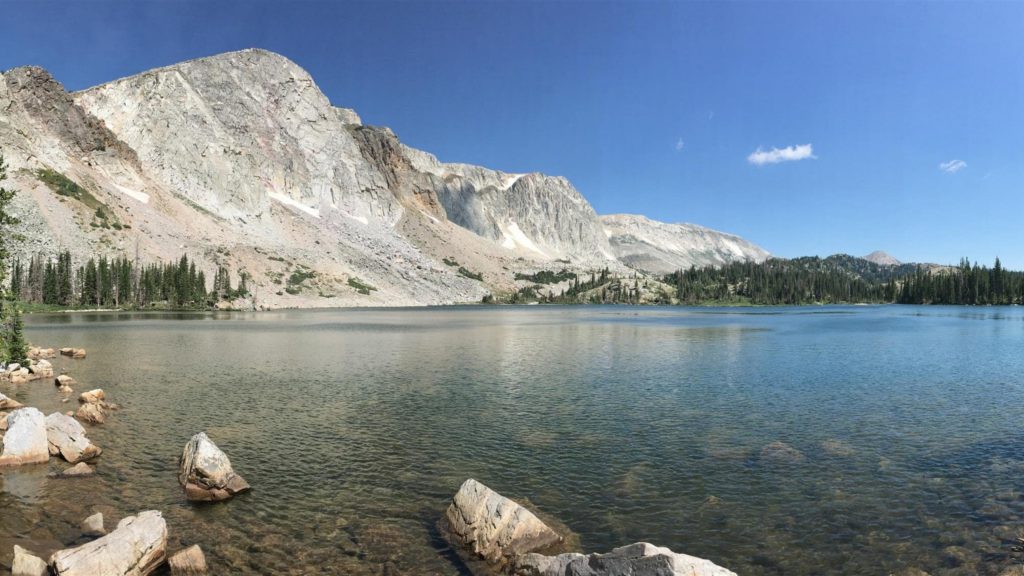
Wyoming Author Day
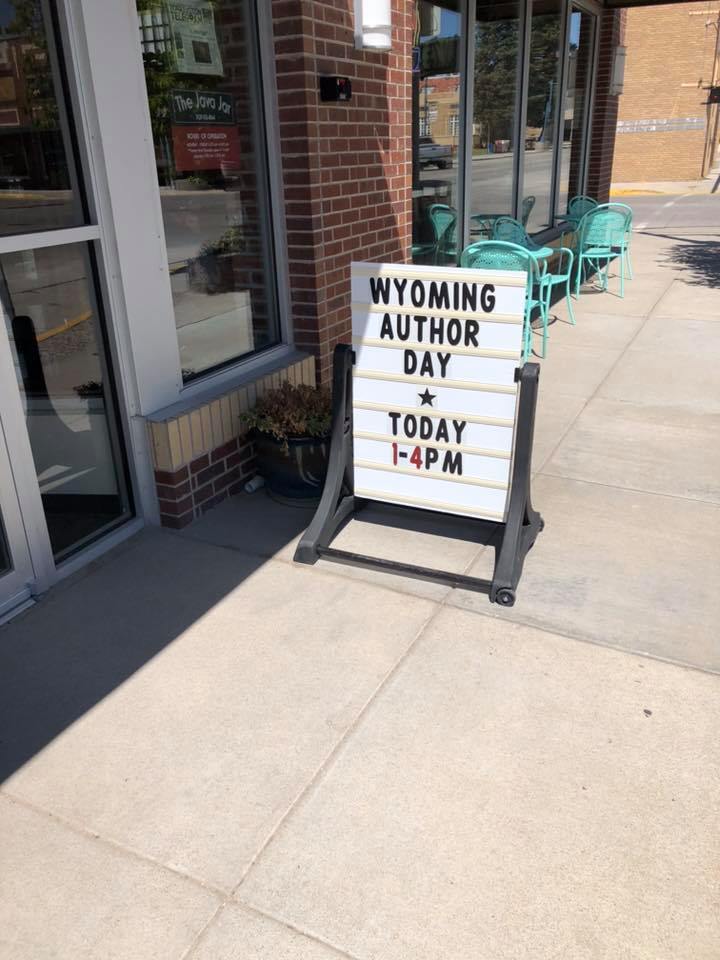
Had a great day on Saturday at Wyoming Author Day in Torrington, Wyoming. Made some great contacts that I’d like to share:
My tablemate, Steven Bates, is a wonderful author of poetry that deals with PTSD, Depression, Suicide, Deployments, Low spots, High spots, even romance and comedy, pride and Patriotism! He offers his books to anyone suffering from depression, PTSD, etc. free of charge. I hope you will check out his site at:
- Steven Bates – www.poemspeak.com
I met several Cheyenne fantasy writers and I am hoping to create a writer’s group or online writing group to work more with these authors in the near future. Please check out their work!
- Helen Pugsley – Helenmpugsley.wordpress.com
- Josh Walker – Josh Walker’s Books
- J.K. Creswell – Niaku: Heirs of Fate
I also connected with two publishers who gave great talks on getting that manuscript to publication. I thank them both for their insight.
- Aaron Linsdau, Chief Editor – Sastrugi Press
- Patricia Landy, Publisher – Crystal Publishing, LLC
Last but not least, I met with Deanna Estes, who provides complete book branding services, including Cover Design, Interior Design, and promotional kits.
- Deanna Estes – Lotus Design
Sold some books and had a great networking experience. A special thanks to Helen Pugsley, Joan Brinkley, and all the great folks at the Goshen County Library for making it all happen. Thank you!
Wyoming Author Day

WHERE IS THE DOG? WHERE IS THE CAT? goes live!
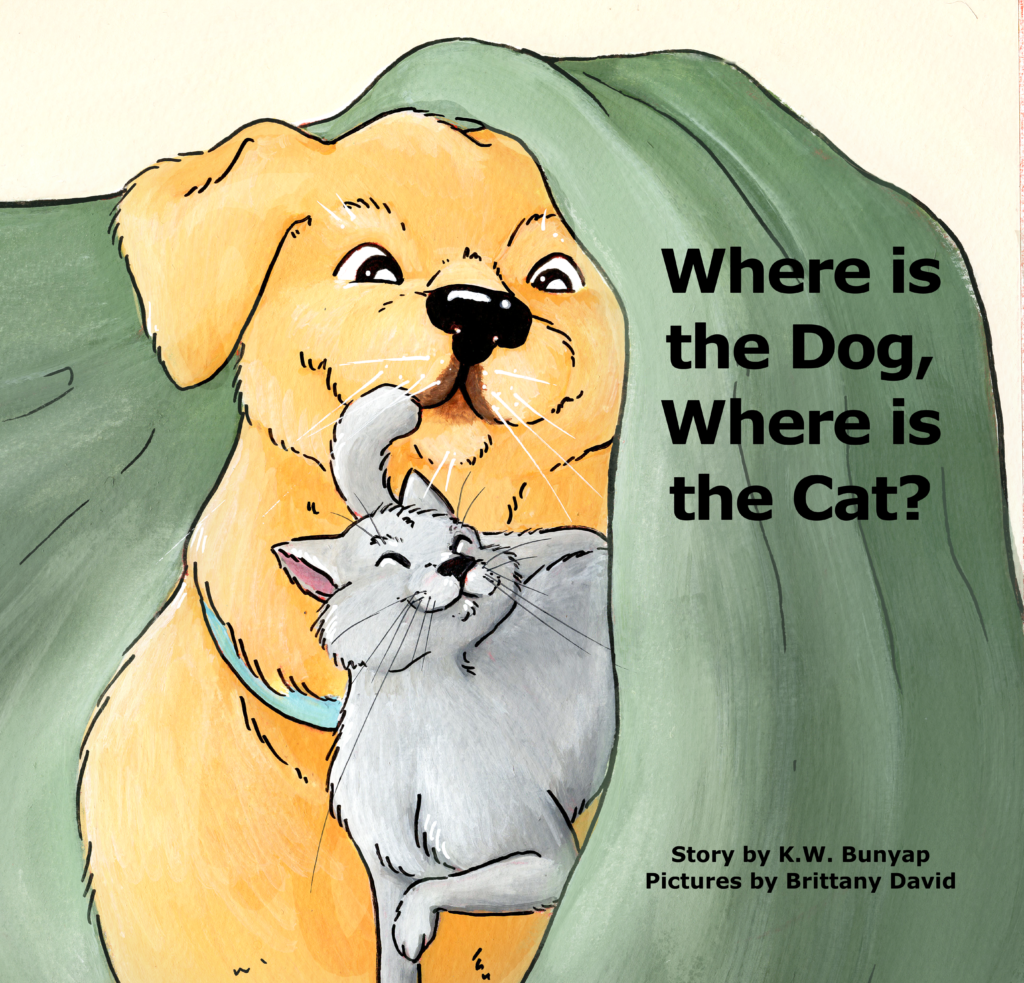
It’s taken much longer than I had anticipated, with several layout reviews that I eventually rejected, but at long last, WHERE IS THE DOG? WHERE IS THE CAT? in paperback is available for purchase on Amazon.com!
You can find it here:
https://www.amazon.com/dp/198379130X
I’ve dropped the price for both my children’s books to $15.00. Note that they are also available as e-books.
I hope you and your children enjoy this fun read-along adventure!
20 Book order from Second Story Books
So excited that Second Story Books In Laramie, Wyoming sold the six books they had previously received and I just delivered 20 more for their cute store!
Woo Woo!


Self-publishing Children’s Picture Books on KDP

I self-published my first children’s book, WYOMING FROM A TO Z, on CreateSpace. Unfortunately, CreateSpace no longer exists. About a year ago, Amazon acquired CreateSpace and absorbed it into their publishing arm, Kindle-Direct-Publishing, also known as KDP.
CreateSpace was geared to traditional paperback publishing, whereas KDP is more geared to the eBook. For novels and short stories, the transition has been fairly painless, but if you want to publish a children’s picture book, you’ll find the process a bit more difficult. This post is meant to walk you through how I was able to do it.
First of all, there are many self-publishing sites out there, but I wanted to stick with something similar to CreateSpace, for one simple reason:
You don’t have to pay anything up front.
KDP offers what CreateSpace did–there was no up-front cost and my royalties were 60% of sales and 40% for international sales. The downside to publishing through KDP is that you can only create paperback books. No hardcovers and no board books. That’s mostly because of the high cost per book to produce. My paperback picture books cost about $3.65 per book to produce. Hardbacks will run $13.00+ and board books even more.
To get started with KDP, I went to their website: https://kdp.amazon.com/en_US/ .
It will ask you to sign in with your Amazon account, and I would recommend you create a new, author account and keep it separate from your personal amazon account.
Once you have an author account, you create your book by clicking on BOOKSHELF. That page will open up to show all of your current paperbacks and eBooks. The first section is where you can create a new title. Note you can create either a Kindle eBook or a paperback. Don’t worry about which one you choose first. You will be given the opportunity to make the other type later on.
The first thing you’ll do is fill in the paperback or Kindle eBook Details: Language, Book Title, Series, Edition Number, Author, Contributors, Description, Publishing Rights, Keywords, Categories, Age and Grade Range, and Pre-Order. The blocks are self-explanatory with the ability to explore in more detail if you have questions about filling out the blocks.
At the bottom, you will either “save as Draft” or “Save and Continue.”
The next box is where you will input your paperback or Kindle eBook content. You fill in details for the following: Print ISBN (it will be created for you,) Publication Date, Print Options, Manuscript, Book Cover, Book Preview, and Summary. Under Print Options is where it starts to get complicated. For a novel or typed manuscript it’s pretty easy, just select the color of your interior, and cream or white paper. Select the trim size of the book, no bleed, and either a Matte or Glossy cover finish. For a picture book, you have to select “Color interior with white paper,” then your trim size, and then be sure to select “Bleed” for your bleed settings, and finally, Matte or Glossy cover finish.
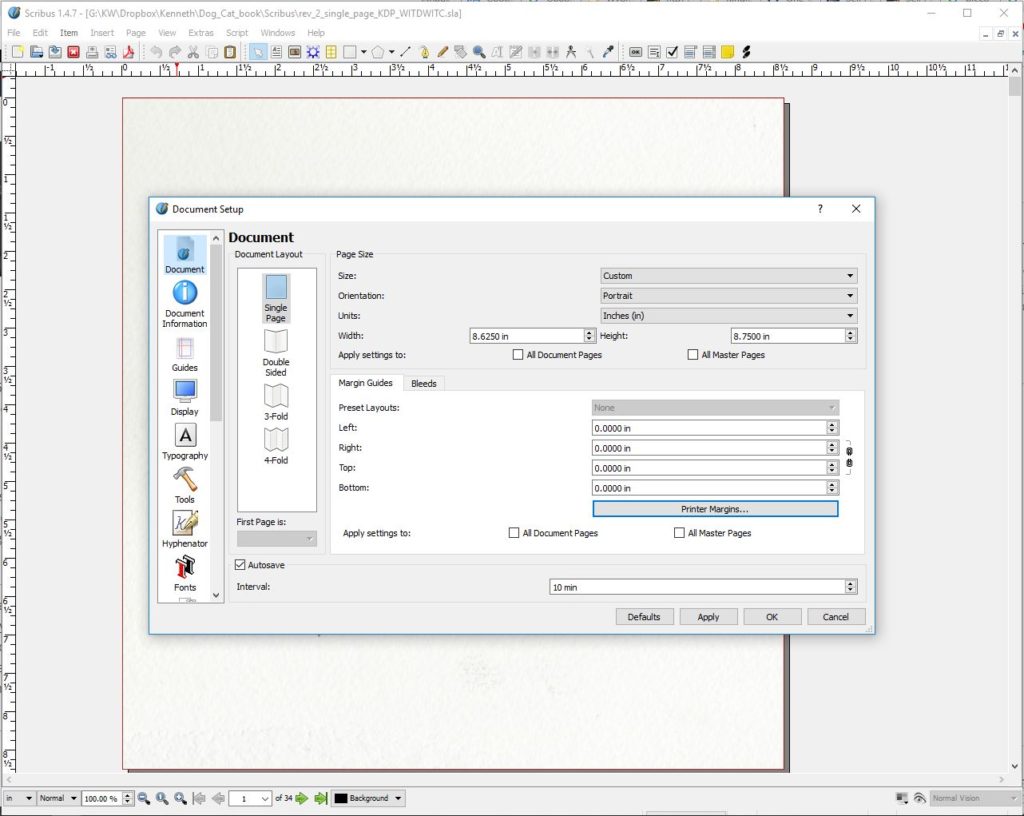
Obviously, the size of your book will determine printing costs. My picture books are all 8.5 in x 8.5 in but you can certainly choose another size.
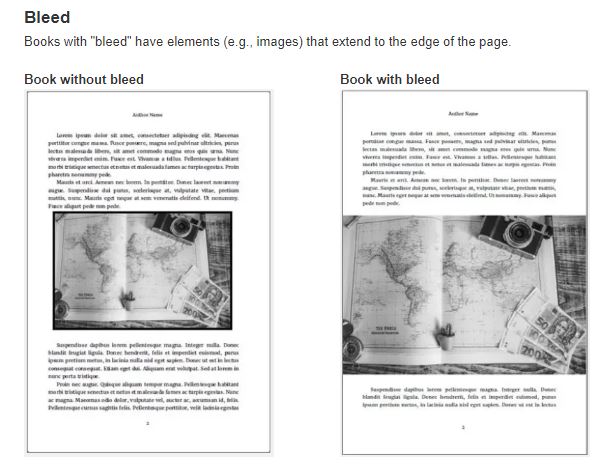
The Bleed setting is the most important and most complicated part of doing the picture book. Bleed simply means the picture extends all the way to the edge of the page, and it’s important for the picture to bleed to the edge of the page so that when it’s trimmed (cut) to be printed, there is no white space bordering the picture. See Figure 1 below for examples of bleed or without bleed.
When determining the size of your picture book, you must add 0.125″ to the page width and 0.25″ to the page height to account for trimming. Using my book for an example, to create an 8.5″ width x 8.5″ tall book, my pages were created as 8.625″ width x 8.75″ tall pages. this goes for the cover too. On the KDP Content page, under Bleed Settings, there is an area of blue text that says “What are bleed settings?” move your cursor over that for an explanation, and click on the blue text in the pop up that says “Learn more about bleed” to go to a web page that covers this in-depth.
The next section on the KDP Content page is Manuscript. This is where you upload your book. Click on the yellow button that says “Upload paperback manuscript.” If you are doing a novel or a document that only contains words, you can upload a Word document here, either in .doc or .docx format. However, if you are doing a document that has pictures, which for me means a picture book, you have to upload a PDF file to be successful. Here’s where KDP drops the ball. When I used CreateSpace for my previous picture book, if the PDF or document I uploaded had a problem, CreateSpace would show you the document and highlight the problem areas on each page, whether a problem with bleed, or text getting cut off, or whatever. KDP doesn’t do that. If there’s a problem with the manuscript you uploaded, you will just get a red “!” with NO EXPLANATION as to what’s wrong with the upload. It could be too large of a document, or any of a number of different things.
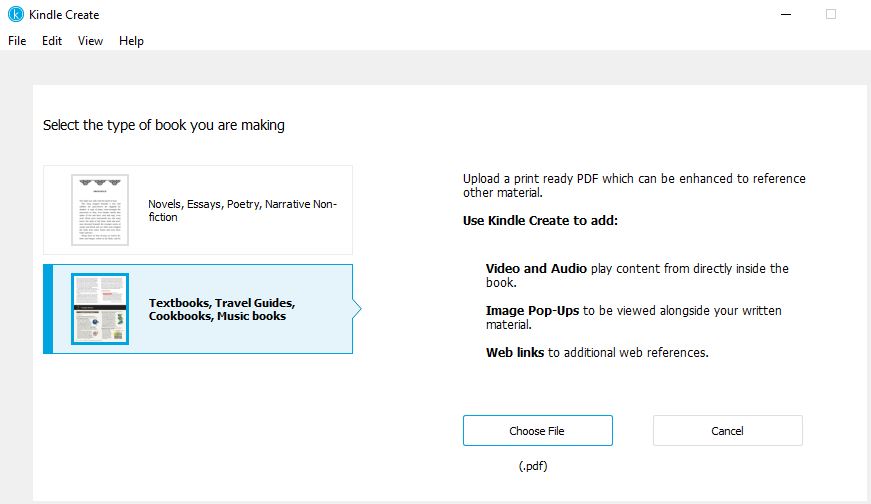
At first, I tried downloading KINDLE CREATE. This is a software program that you can use to make the book. The software allows you to select the type of book you are creating: either a novel, essay, poetry, narrative non-fiction. The software looks like this:
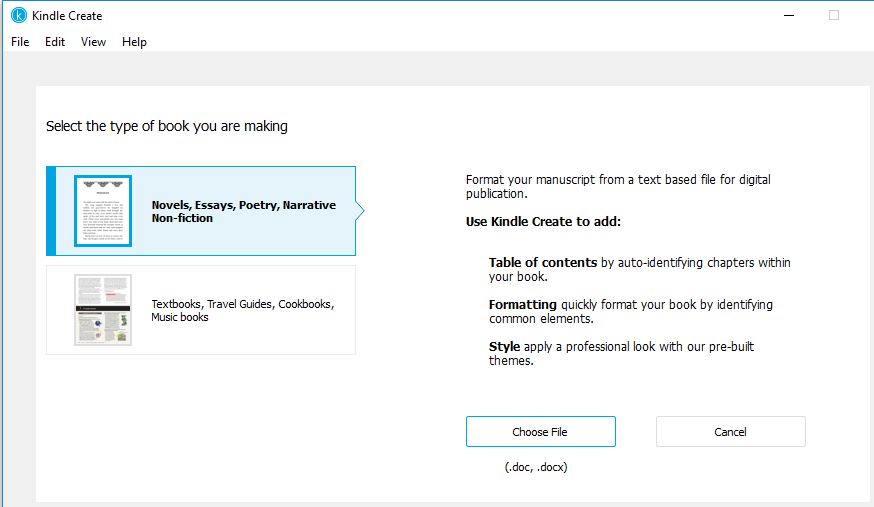
As you can see above in Figure 2, at the end, you are still stuck with having to upload a file of your manuscript. For a picture book, your only other choice is the second option, selecting the textbook, travel guide, cookbook, music book option. Selecting that option brings up what you see below in Figure 3.
Again, you end up at the same place, having to upload a PDF of your manuscript. I even tried downloading another KDP program called “Kindle Kid’s Book Creator,” but it does the same thing. You still have to have a PDF to upload, and if the program doesn’t like the PDF it is rejected without explanation.
Here’s how I got around that:
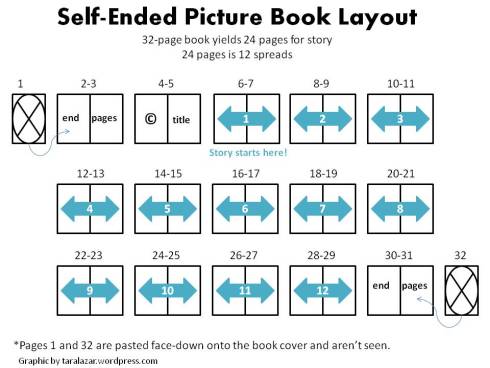
You can use a drawing program like Adobe Illustrator if you can afford it, but I use a free program available online called “Gimp.” It is a fantastic program for drawing, and also for creating pages using photographs, etc. Before we get into Gimp, you need to know there are two types of children’s picture book layouts: Self-Ended, which uses 12 spreads or 24 pictures (Figure 4)
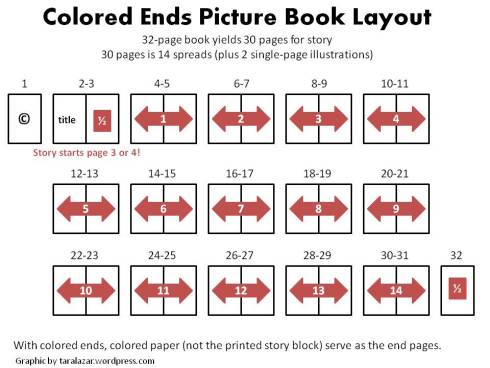
Or the Colored Ends Layout (Figure 5.) This is the layout I went with for my children’s books.
I made my own illustrations for WYOMING FROM A TO Z, but for my second book, WHERE IS THE DOG? WHERE IS THE CAT? I hired the wonderful Brittany David to do my illustrations. She made 14 spreads and 2 single page illustrations for me. I ended up with 600 dpi illustrations.
Using Gimp was fairly straight forward. I needed to create pages that would be 8.625w x 8.75h to include the bleed for my 8.5 x 8.5 book. Now, since my illustrations from Brittany were spreads, I created a new document I named “single_page” with the dimensions 8.625w x 8.75h for my single pages and then created a second document named “spreads” with the dimensions 17.25″w x 8.75″h. I dragged and dropped the illustrations to the document in gimp. then added text. (See Figure 6 below.)
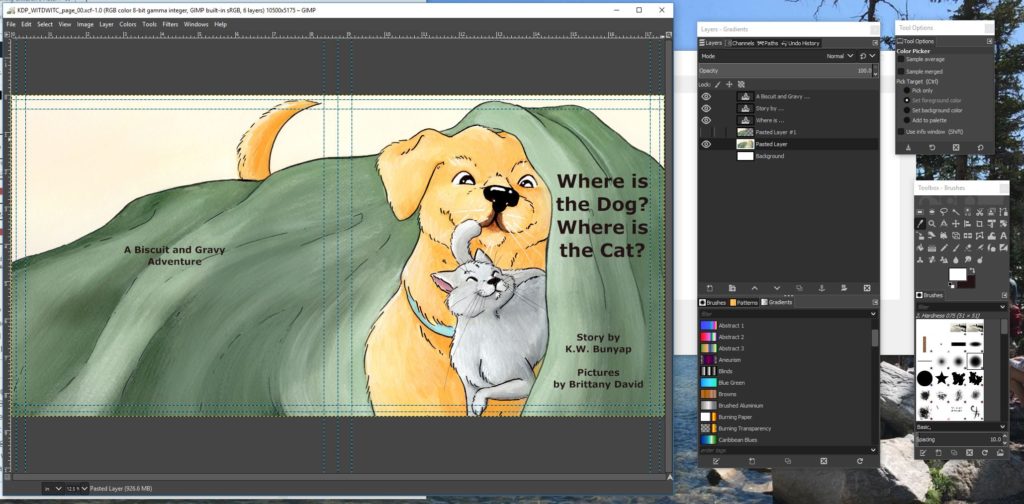
If you look at the picture above, I added 0.125″ margins on all the borders to see where the bleed was, and also added second 0.375″ margins to see where the text was placed so as to make sure no text was cut off at the page edges.
Gimp worked well because after I saved each picture as a .xcf file (gimp file) I could export the picture as a jpeg file (.jpg). I ended up cutting each of my spreads in half so that I had a total of 30 half-page jpegs that were the correct dimensions (8.625×8.75.)
I learned that in Word you can save a file as a .pdf instead of a .docx. However, working with Word was very difficult when trying to place pictures on each page. It’s very clunky and often the facing pages would not be lined up. In the end, I ended up downloading a new, free program called Scribus, which works great for desktop publishing. I created a new document in Scribus with width and height as seen below in Figure 7. Note the margins are set to o.ooo.
Open the second tab, called “bleeds” and set the margins for 0.000 also.
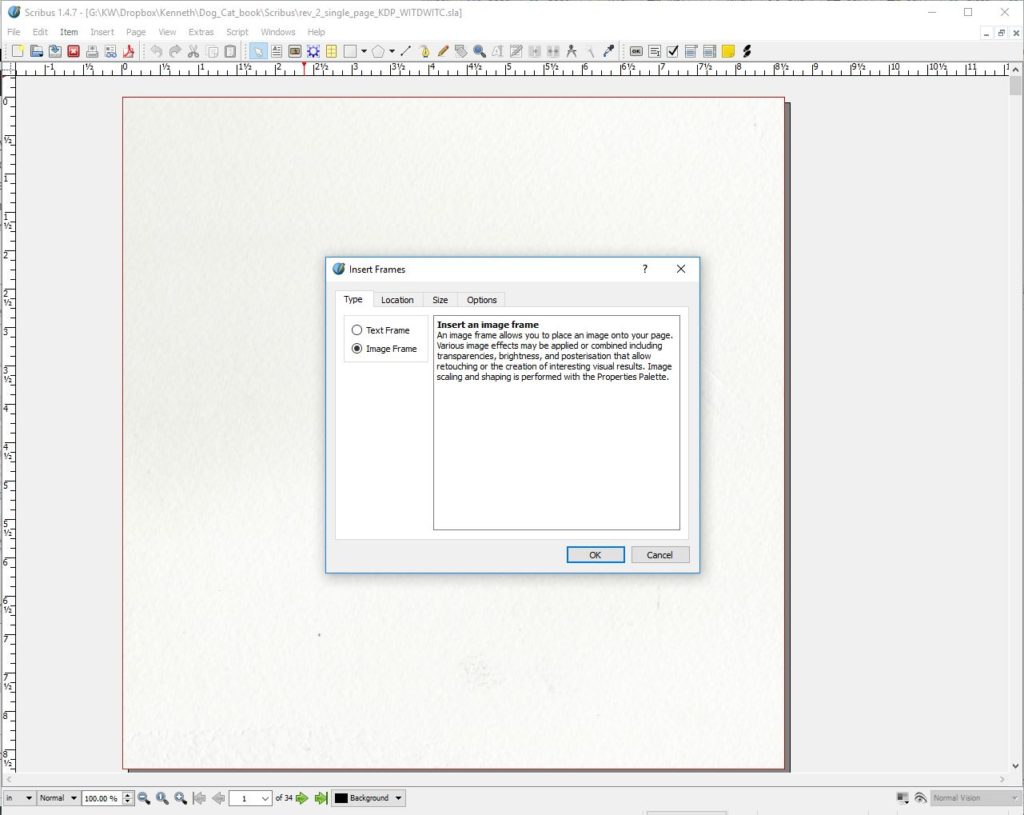
Next, I would select each frame, then select “Insert” from the top menu, select “frame,” then select “image frame” from the “type” tab. (Figure 8.)
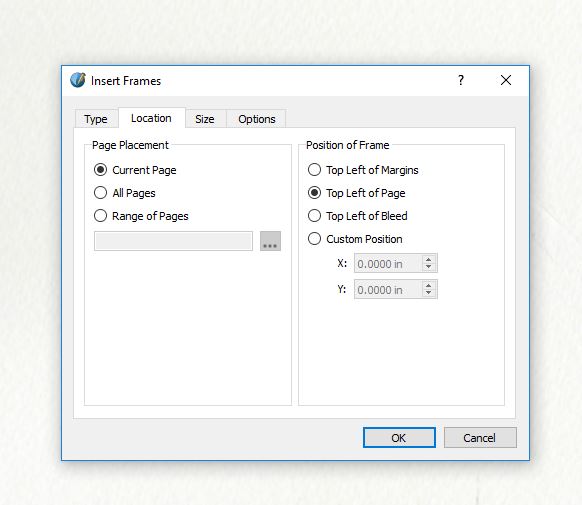
Select the “location” tab and choose “current page” and for “Position of Frame” select “Top left of Page” (Figure 9.)
Then select the “Size” tab and select “Same as the Page.” Click “Ok”. On the page you will see a big X appear, extending from page corner to page corner. (Figure 10.)
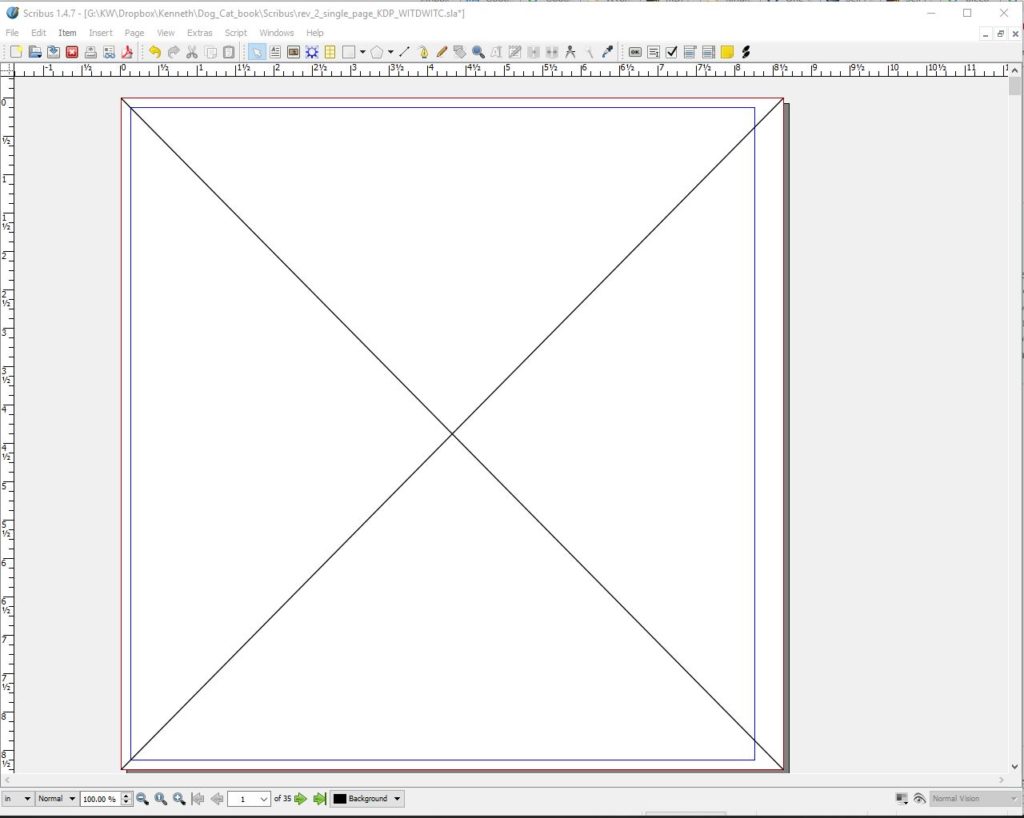
Now just drag and drop your .jpg image to each X frame. The .jpg should already be the same size as the frame, both (8.625 x 8.75) in my case.
I ended up with 30 total pages, then I added a “The End” at the end, and a dedication page at the beginning so I ended up with 32 pages. Once all the Scribus pages were in order, I saved the Scribus file, then chose “File”, “Export”, “Save as PDF.” The exported file was the file I uploaded to KDP.
Next on the KDP Content page is Book Cover. I uploaded a 17.25″ x 8.75″ spread book cover (front and back) that I had exported from Gimp as a PDF. Took the image in Figure 6 and exported it by selecting “File”, “Export as”, “Select File Type (By Extension)”, then “Portable Document Format” as shown in Figure 11.

This Cover .pdf is what I uploaded to KDP for the cover. You can also use their cover creator if you desire.
If all goes well, at this point under Manuscript and Book Cover it will say “uploaded successfully.” Then you go to Book Preview on the KDP Content page and select the yellow button “Launch Previewer”.
Be sure to “Save as Draft” periodically.
After launching the Previewer (it takes awhile to load,) you can scroll through the uploaded book. In my case, there was a bit of white space at the top of each page which looked like it was wrong. I recommend you do like I did and go to the upper right of the page and click “Download a PDF proof” and look at the download in your PDF viewer. I use Adobe Acrobat. When I did this, the white space was gone and the proof looked great.
After reviewing, click “Approve” and to “Exit Print Previewer” if you are happy with the look of the proof. The summary at the bottom of the KDP Content page will show the printing cost per book. click “Save and Continue” and you will go to the PAPERBACK RIGHTS &PRICING page. I selected “All territories (worldwide rights)”. Determine your list price by doing a little google research. The PRICING AND ROYALTY section will show your percent rate and royalty payment per book.
The next thing you should do is “Request printed proofs of this book” so that you can review a hard copy. You’ll have to follow the instructions and purchase the proof from Amazon. The shipping costs about as much as the book, but in a few days you’ll get the hard copy.
Make any changes by repeating the steps above, and when you are happy with the printed proof copy, you can select “Publish Your Paperback Book” and it will go live!!!
You can do the same thing as outlined above to upload an ebook. You essentially upload a PDF, just like you did for the paperback. I personally don’t like the way picture books look on tablets, Kindles, and eReaders because they are all of different screen sizes. But, I would download the KINDLE CREATE program as mentioned above, because the program does help you create an eBook with text that will expand when clicked on, which is a nice added feature. When you finish the same process with the eBook and are satisfied with the Proof, you can Publish the eBook the same way.
I hope this blog post has helped you to navigate publishing a Children’s Picture Book on KDP. If you have questions or comments, feel free to add them here or email me at authorkwbunyap@gmail.com
K.W. Bunyap
2019 Wyoming Writers Inc. Annual Conference
The dust is settling from attending my first writer’s conference. Wow! What a great time. I enjoyed spending the weekend with other Wyoming authors where we got a chance to critique each other’s work, promote our work, and get re-energized about our craft.
I learned quite a bit and wanted share some of my lessons learned.
Critique groups: Bring copies of your work for others to have during the session. You would think this would go without saying, but I’ve never actually attended a real, live critique group. All my previous experience was with online groups. Bringing copies of your work just allows everyone to have something hands on to use, keep, and refer to during the session.
Paddle Panel: What a great experience this was. Authors at the conference submitted formatted copies of the first page of their work, sans names, and they were read at breakfast during the last morning. The panel of agents, authors, and board members of Wyoming Writers Inc. held signs that either said “Stop” or “Go” and they could hold them up during the readings to indicate their passion or lack of for the piece. The panel provided great feedback on what was needed to make that first page reach out and grab the agent/publisher and make them want to read more. Happily, I did not receive a “stop sign” during my reading. The feedback very helpful, making me realize my hook was about half-way down the page, and I need to move it to the first paragraph. Also, I need more “action” to kick off that first page. Setting the dark tone can’t be done at the expense of using up all the real estate on that first page when you are trying to hook the reader.
Open Mike: What a fun time. Authors get five minutes at the mike to read their work. Caution: don’t panic as I did when I discovered the agent I was pitching to the next day was in attendance. I was afraid to read what I was going to pitch, so I switched to something else and bombed miserably!!! At least I was brave enough to read some SF to the group.
Author and University of Wyoming professor Brad Watson was our keynote speaker, and also conducted a session titled “You’re Talking to Yourself.” I’ve never enjoyed writing prompts as they tend to direct you toward thinking in the present while I’m usually working in the medieval time frame and location of my fantasy novel, but Brad’s writing prompt, designed to get me to describe the scene from the subconscious feelings of the POV character, helped to strengthen my writing and made me realize how important it is to take the time to get into the character.
Agent Angie Hodapp of Nelson Literary Agency gave two outstanding sessions, one titled “Query Letter Bootcamp,” and the other titled “High Concept Explained.” Both were outstanding and really helped to clarify two very difficult subjects.
Writer, editor and blogger, Sarah Reichert gave a great session titled “Out in the World – Publishing Your Novel in Today’s Market.” Her humorous and down-to-earth approach helped to navigate through the world of traditional and self-publishing.
I was privileged to have the chance to pitch my latest children’s book, NEVER CONFUSE A PIRATE WITH A PIRATE to Stephanie Hansen, owner and senior agent at Metamorphosis Literary Agency. She was professional, warm and gracious, and was kind enough to sit through my fifteen minutes of rambling. I was scared to death for my first pitch, but she was delightful and gave me some great insight.
My 4th grade Wyoming book titled WYOMING FROM A TO Z was a big hit at the conference. It helps that there were a lot of teachers and librarians in attendance. I featured the book in the bookstore and sold eight copies!
If you get a chance to attend a writer’s conference, I highly recommend it. Well worth the money and a superb way to hone your craft.
I will definitely attend again next year.